Saturday, December 21, 2013

Numbers, numbers, and more numbers!

Here I am showcasing 3 cards I have made recently at the request of my friends. Using the awesome Gorgeous Grunge stamp set from SU and a little bling, I think these turned out GREAT! 


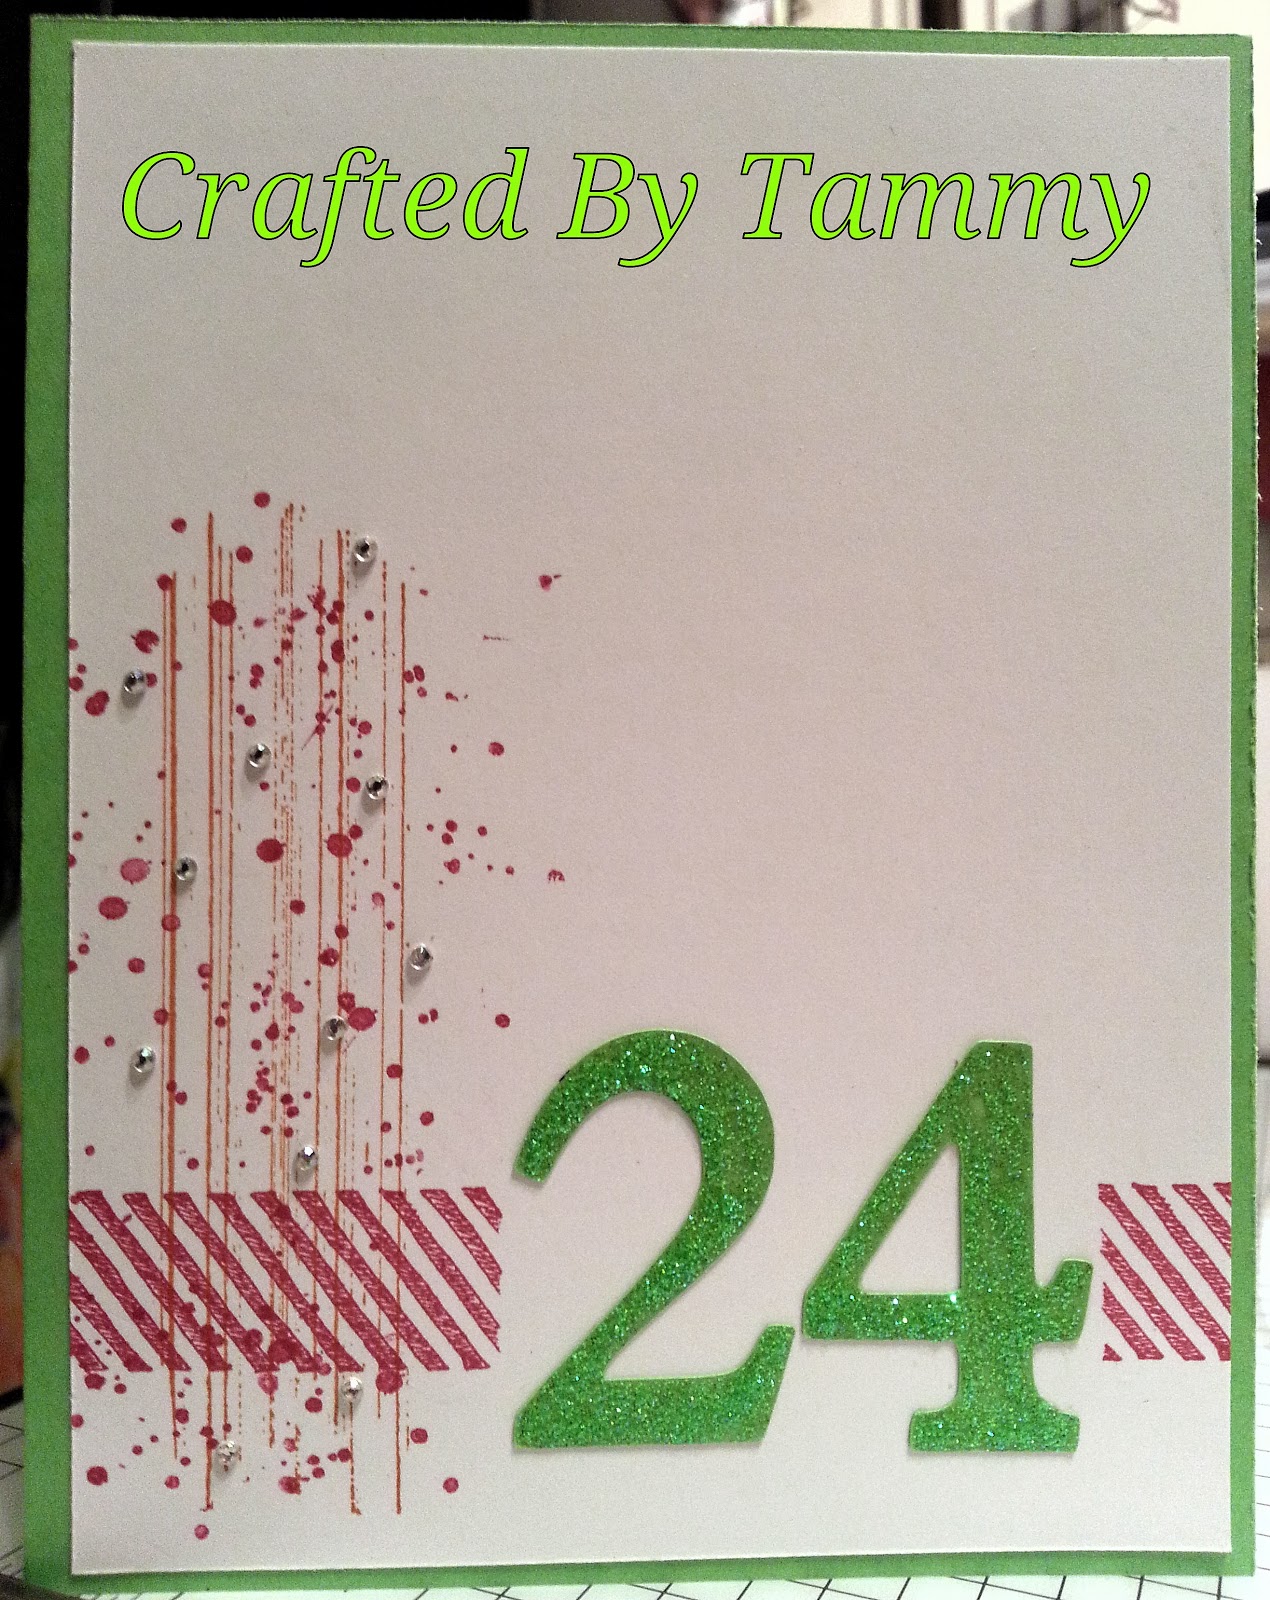
The first card is for a Sweet Sixteen. I asked for a favorite color and was told Lime Green. So I found the closest cardstock I had to Lime Green, used my Cricut for the numbers, some Stickles for the sparkle, a few blings from my stash and came up with this - - -


I chose Melon Mambo and Pumpkin Pie to accent the Lime Green. 
I think that color combo turned out quite well. I used a mask to create some space for the numbers. 


Soon after that card, it was time for my husband's nieces birthday. She turned the Big 8! I thought this layout would work well for her too. 

(bad edit, sorry)

Her favorite color is Purple. I had run out of Concord Crush (which I think is a great dark purple!!) so I had to go begging borrowing from my friend down the street. 
**I am so disappointed that Concord Crush is discontinued. 


I shared the Purple 8 card with my Facebook friends and family and had a friend request a card with 24 and use bright colors. So, I basically copied the Sweet Sixteen card and used 24.


I had my friends tell me I did a nice job. And I inspired one of them to create her own!  I don't think I have ever been the inspiration for a card before, LOL. Here is the link for that -  http://3monkeysthrowingaroundsomepaper.blogspot.com/2013/11/stampin-up-tag-bag-flower-shop-stamp.html


Stampin UP! Supplies
Stamps - Gorgeous Grunge
Ink - Melon Mambo, Pumpkin Pie
Cardstock - Concord Crush
Craft Store Supplies
Cardstock - white, lime green
Stickles
Cricut was used to cut out numbers


Thursday, December 19, 2013

Patriotic Pocket Calendar

I have used one of these for as long as I have been an adult. I use this to keep track of bills that are due and which paycheck to pay it with. Earlier in my adulthood, I kept track of important dates. I still have the one I wrote in when I found out I was pregnant with my daughter in 1993!!

Now, I know there are apps for my smartphone but I keep coming back to this for the bills.

Real simple project to do. And it can be personalized!! You can make several and switch them out with the seasons or whatever bag/purse you are carrying.

On this patriotic one, I used a square punch and large heart punch. Figured out a pattern for my squares then started gluing them to a piece of white cardstock. Staple your creation to the calendar. Bend and insert into the plastic cover.
 
Note: score down the center, where the staple will go. Then about an 1\8 on an inch each side of that scoreline, score it again. Those scorelines help the cardstock accommodate the thickness of the calendar when stapled.

Saturday, September 21, 2013

More Handmade Cards for the Auction

Here are some more cards for the benefit auction.

These cards are not necessarily CASE'd or copied. 
The layouts have probably been used over and over on cards you can find on blogs and websites 

* * * * * * * 

First off, here is my all time favorite stamp set.....

 ! ! Extreme Elements ! !

And one of the companions to it, Extreme Guitar.

For the Boys - -

SU-Not Quite Navy, Old Olive


For the Girls - -

SU-Basic Black, Melon Mambo


And here are a couple of Sock Monkey cards.

Who doesn't love Sock Monkey??


SU-Sock Monkey
Hobby Lobby-Stickles


SU-Sock Monkey
Hobby Lobby-Stickles


And a couple of cards for "any occasion".

SU-Echos of Kindness


SU-Attic Boutique, Soft Suede, Very Vanilla
Hobby Lobby-stamp

Note: Blog post about the last card to come at a later date.

I love that Very Vanilla goes with just about any color. Not all of them though! 
Just several that I have been using lately.  Like, Kraft, Soft Suede, Black, and Kraft.


Friday, September 20, 2013

Handmade Cards for Auction

Showcasing the cards I made for the benefit auction. I blogged about one of the other cards the other day. But haven't been able to get back to my blog because I have been so busy! 

I will have a few more cards to show off  blog about here in a couple of days. 
(maybe tomorrow)

These are CASE'd from cards I found on Pinterest

 SU-Old Olive, Not Quite Navy
Happiest Birthday Wishes

SU-Chocolate Chip
Stripes folder, Deco Label punch, Thank You Kindly
Hobby Lobby-white, patterned paper, twine


These next three cards that I found on Pinterest or on the World Wide Web and have changed something about it from the original.  

 SU-Kraft, Very Vanilla
Baroque Motiff, Deco Label punch

 SU-Very Vanilla
Extreme Dirt Bike
Hobby Lobby-black & gray cardstock
SU-Very Vanilla, Soft Suede, Crumb Cake


I enjoyed making these and hope they bring lots of 
$$ Moolah $$ 
for my friend when they are auctioned off!


Wednesday, September 11, 2013

Pink and Black card

Here I go again with pink on a project. Granted, there isn't a lot of pink so it will be okay. :)


I am in need of several cards for two different needs. 
An auction and a fundraiser. 
So I am making two sets of cards. About 9 cards in each set


This is the first card I will blog about.
I made this one a couple of months ago just to have in my card stash.


Here is a card using the same supplies but different layout....


I layered the black and white strip of cardstock onto two different shades of pink.
And moved it to the edge of the white cardstock base.

Notice that there aren't as many flowers? I thought the design needed to be simplified 
so i didn't use as many on the rest of the cards.

And the third card using same supplies...


I moved the strip over a little away from the edge and moved the sentiment away from the strip


I even made a fourth card using these supplies but I can't show it 
because I am actually giving it to someone.

I love how versatile a design/layout can be. 
You can use all the same supplies and come out with different cards.
How cool is that??!! 

Stampin UP! Supplies
Stamps - Made For You, Nursery Necessities 
Punches - Oval, Scallop Oval, Itty Bitty Shapes
Craft Store Supplies
Cardstock - white, pink, black
Stickles

Saturday, February 23, 2013

Non-traditional Valentine card

This is the last of my non-traditional Valentine's Day cards that I made.  

I really like this layout. Simple. And easy.


Layering the smaller cardstock with the image over the embossed background helps the image to stand out. 


Maybe next year I will do traditional cards. 

Maybe.


Stampin UP! Supplies
Cardstock - Pacific Point
DSP - Petals & Paisleys (retired)
Stamps - Punch Bunch
Markers - Old Olive, Daffodil Delight, Melon Mambo, Pacific Point
Folder -  Finial Press
Craft Store Supplies
Cardstock - white
brads


Saturday, February 16, 2013

Sweet Valentine Card

This card is one of the four that I made for a friend. 

I used non-traditional Valentine's Day colors.  
I think of traditional colors being red and or pink.  

I'm not sure what made me choose Pacific Point for this. 

But I like it!


I traced a bowl on the white cardstock, then cut around the edge. 
Glued that to the Pacific Point cardstock and cut around that, leaving an edge, so the white has a border. And added a small bow for a little more detail. 


When I started making this set of cards, 
I made my self get out some paper that I was hanging on to. 


 I'm glad I did. This turned out really to be a real sweet card.


(The dsp is so old that when I Googled it to find some inspiration, no matches came up, LOL. 
So I took a picture of it so you would believe me about the name.  
When you Google, Petals & Paisleys, you get Petal Paisley or 
something like that which I think is a current dsp.)


Stampin UP! Supplies
Cardstock - Pacific Point
DSP - Petals & Paisleys (retired)
Stamps - Punch Bunch
Markers - Old Olive, Daffodil Delight, Melon Mambo, Pacific Point
Craft Store Supplies
Cardstock - white
ribbon


Friday, February 15, 2013

Simple Valentine's Day Card

Yes, The Hubs did get a Valentine card from me. 

And on time. 

Go me!!

The previous cards I have posted were for a friend to give to her daughters. I had fun being crafty outside my box. You know, girly paper, fussy cutting, ribbon....

(I will post two more Valentine cards this weekend

(look at me....just posting away, LOL)

Now back to the card for My Valentine

Back to simple and easy. 


Chocolate Chip is one of my favorite colors! 


Just a little Love goes along way.
I love him so very much. :)


And Crumb Cake! It goes with everything!!! 

I like how the crimping helps 
the heart "Pop" just a little more.


(When you add a bright color with Crumb Cake, it just "POPS" doesn't it??)


I was asked once what my fav SU color was. I was like "really??". How can you ask me to choose??!! 
I have a lot of favorite colors. I can't pick just one! 

Can you??


Stampin UP! Supplies
Cardstock - Crumb Cake, Real Red, Chocolate Chip
Large Heart Punch
Stamps - Tiny Tags
Ink - Real Red
Craft Store Supplies
Cardstock - white
twine


Wednesday, February 13, 2013

Valentine Card

Using up more of my stash of this beautiful DSP, Attic Boutique.


See what I did here? I cut out some of the larger flowers from the paper. Layered and glued them onto white cardstock. 
Then cut around the edges. 
And then did it again with light blue cardstock.

I know, I should have taken pics. Sorry. 


Ribbon. Cutting. Layering. 
Fun elements and techniques make for a pretty card.


And no ink on this one either!!  The one I posted yesterday didn't have ink on it either.


Stampin UP! Supplies
DSP - Attic Boutique
Craft Store Supplies
Cardstock - white, light blue
ribbon


Tuesday, February 12, 2013

Cards for Valentine's Day


Valentine's Day is upon us. Will I get The Hubs a card made in time? We shall see! :)


I will start today by announcing that I don't like Pink. 
We just don't get along. 

Not Pink the artist/singer, but Pink the color.  

I just can't seem to make it work.

I have tried!!


I think this is only my second pink card. 

Ever.


I really like this patterned paper. And have been hoarding the pack for a while. Waiting for just the right card/project to use it on. 

What do you think??


I'm not happy with the bow. But that's the only pink ribbon I have.

Remember?? 
Pink and I don't get along so I kind of avoid it at all costs. :)


Stampin UP! Supplies
Cardstock -Very Vanilla, Crumb Cake
DSP - Attic Boutique
ribbon
Finial Press embossing folder
Craft Store Supplies
Cardstock - pink
brads

Friday, January 18, 2013

Gender Neutral Baby Card

I have not used the Glassy Glaze from Stampin UP yet. I kinda' forgot about to tell you the truth. It has been discontinued so I will have to find a replacement when this jar is gone. 

I was asked to make a gender neutral baby card. 

Yellow and green colors came to mind. So I assembled my supplies and got to work.


I opened the ink pad and pressed it onto the white cardstock. If you look closely you can see the texture of the pad.  Then I pressed the VersaMark pad over the inked cardstock. I sprinkled the Glassy Glaze on the cardstock over the VersaMark, then used the heat gun to melt the powder.  I stamped a star onto the back of the glazed cardstock.  Then fussy cut it out. 


I had already done the same procedure for the Pear Pizzazz. You can see it in the background.

I like the effect of mixing the two colors. I used the opened ink pads on the cardstock, overlapping the colors. You can see the lines from the edge of the Pear Pizzazz pad.

I used the Perfect Polka Dots embossing folder on a strip of white cardstock. Turned it over so that the indention of the dots is what shows. I stepped outside the box on this one, normally you would want the raised dots to show.

Here is the finished gender neutral baby card.


Stampin UP! Supplies
Ink - Daffocil Delight, Pear Pizzazz
Extras - Glassy Glaze emboss powder, VersaMark
Craft Store Supplies
Cardstock - white